Configure self-managed protection
Go to the Protect tab. If you do not see this tab, you cannot control which files are and are not protected because your administrator has that control. In this case, this section is not applicable to you.
On the Protect tab, if you see a table with checkboxes at the left side of each table row, you have a self-manged configuration. Use this section to help configure your self-managed protection. If you have the Protect tab and the table does not have checkboxes at the left side of each table row, you have a hybrid configuration. See Configure hybrid protection for details.
The Protect tab is divided into two sections.
- What would you like to protect—This section contains backup rules that define what files to include in your backup.
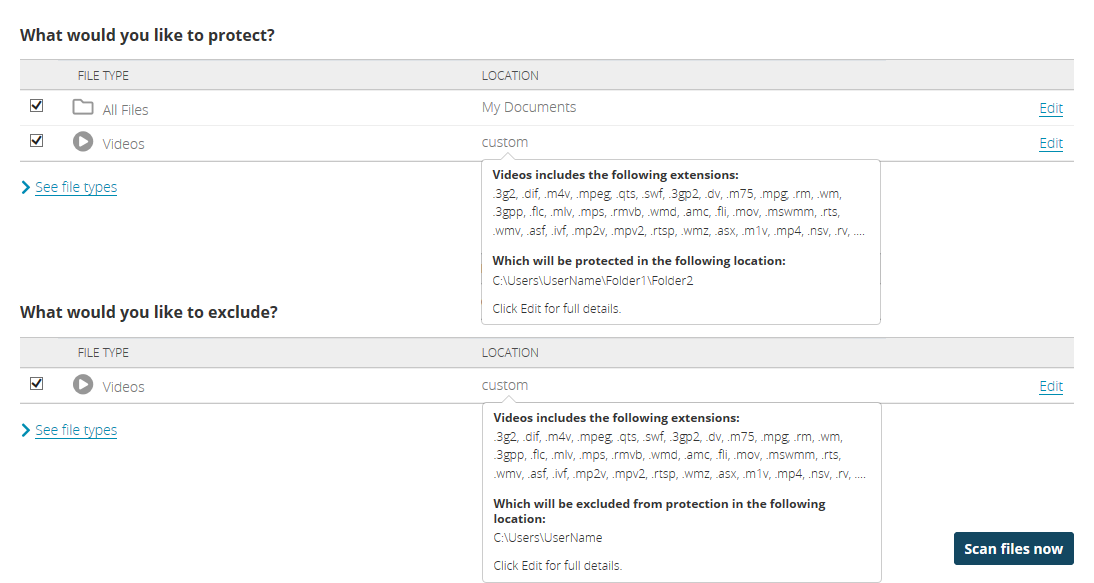
- What would you like to exclude—This section contains exclusion rules that define what files to exclude from the backup.
The include and exclude sections are defined by a file type and a location. The file type can be pre-defined (all files, documents, email files, music and audio files, photos and images, or videos), or it can be a custom file type that you create. The location can be one specific location or multiple locations.
If you do not see the table of available items in either the protection or exclusions sections, click See file types.
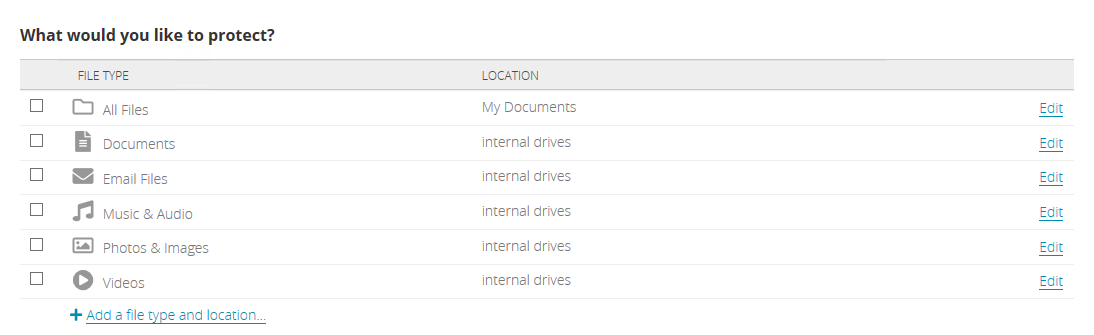
- Select any of the pre-defined file types and default locations for backup or exclusion by clicking the checkbox to the left of the item. For a complete list of the file extensions classified within a file type, hover over the file type name or click Edit to see the details of the backup or exclusion rule.
- All Files, My Documents—On Windows devices, this option backs up or excludes all files stored in your My Documents folder.
- All Files, Documents—On MacOS devices, this option backs up or excludes all files stored in your Documents folder.
- Documents, internal drives—This option backs up or excludes all documents stored on all internal drives on your device.
- Email Files, internal drives—This option backs up or excludes all email related files stored on all internal drives on your device.
- Music & Audio, internal drives—This option backs up or excludes all music and audio files stored on all internal drives on your device.
- Photos & Images, internal drives—This option backs up or excludes all photo and image files stored on all internal drives on your device.
- Videos, internal drives—This option backs up or excludes all videos stored on all internal drives on your device.
- If you want to modify the location of any of the pre-defined file types, use the following steps.
- Click Edit to see the details of the rule.
Click Add a specific location, select a volume or folder, and click OK. The location will be included or excluded recursively, which means the rule is automatically applied to the subfolders of the specified path (unless another rule exists for a subfolder).
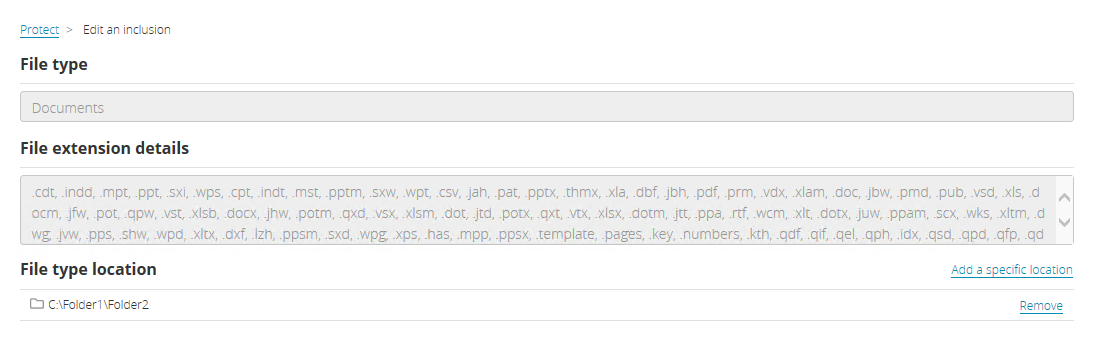
- Repeat the previous step to add multiple locations. Review the caveats below to understand how multiple rules interact with each other.
- If you need to remove a custom location, click Remove. Remove all custom locations to go back to the default location.
- Click Save to save the modified rule.
- If you want to create your own file types to backup or exclude, use the following steps.
- Click Add a file type and location. (If you do not see that link, click See file types to expand the table and view the link to add a file type.)
Specify the details for the rule.
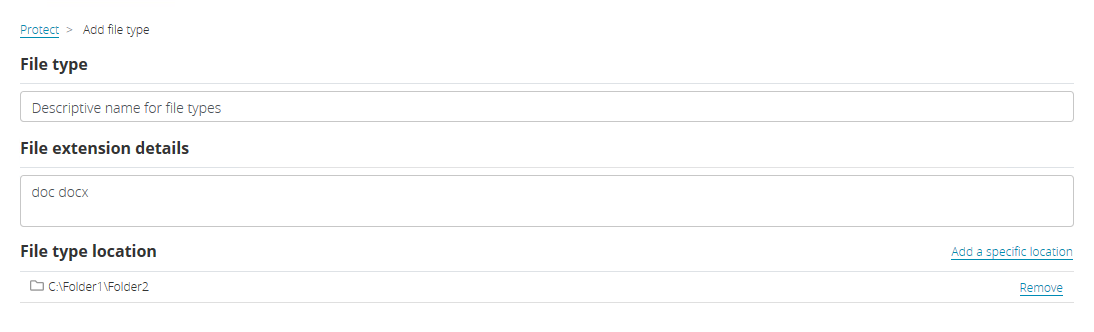
- File type—Specify a unique and descriptive name for the types of files you want to back up or exclude.
- File extension details—Specify the file extensions you want to back up or exclude. If you are specifying more than one extension, separate them with a space. Do not use periods, commas, asterisks, or any other characters specified in the console as invalid.
- File type location—Specify the location to look for these types of files. The location will be included or excluded recursively, which means the rule is automatically applied to the subfolders of the specified path (unless another rule exists for a subfolder).
- Click Add a specific location, select a volume or folder, and click OK.
- Repeat the previous step to add multiple locations. Review the caveats below to understand how multiple rules interact with each other.
- If you need to remove a location, click Remove.
- Click Save to save the custom rule.
If you later want to go back to the default location for a pre-defined file type, go back to Edit and Remove all locations.
If you later want to delete a custom rule, go back to Edit and click Delete set.
Keep in mind the following when defining and selecting your rules.
- A rule for a file type will take precedence over a rule for All Files.
-
In the case of multiple rules, files use the rule that is closest in the folder structure to them. In the following example, all files and folders under My Documents (which is C:\Users\UserName) will be backed up (the first rule). However, video files will be excluded from C:\Users\UserName and its subfolders (the third rule), except the videos located in C:\Users\UserName\Folder1\Folder2 and its subfolders will be included (the second rule).
- There are some default exclusions which cannot be overridden. For example, on Windows, system files and files and folders marked with an offline attribute will not be backed up. On MacOS, block devices will not be backed up. On both operating systems, .tmp files will not be backed up. Contact your administrator for a full list of excluded files.
- Your administrator will limit large files from being backed up. For example, if the administrator sets the maximum file size to 10 GB, then files included in a backup rule that are larger than 10 GB will not be backed up.
Once you have configured your protection, you can wait until the next scheduled scan or you can click Scan files now on the Protect page or on the Home page. If you manually scan, the timing of your next scheduled scan will be reset.
Starting with MacOS 10.14 Mojave, the operating system includes a security feature called Full Disk Access (FDA) which blocks applications from accessing specific locations. This may prevent Data Protection from backing up and restoring files, such as Apple Mail, Photos, Calendar, and so on. In order to back up and restore these files, you must grant Data Protection access within Full Disk Access. Make sure you make the following change on a MacOS 10.14 or later device.
- Under the Apple icon, click System Preferences, Security & Privacy, and on the Privacy tab, select Full Disk Access.
- If the padlock icon is locked, click the icon and enter your MacOS credentials. Do not use your Apple ID or Data Protection credentials.
- Click Add an application (the plus icon), highlight Applications on the left, select Data Protection from the list, and click Open.
- If desired, click the padlock icon again to lock Full Disk Access.
- Restart the device.